Handloading/Reloading Ammunition
-
A few regulars in this forum have asked, either through PM or in some of the threads, what is involved in handloading/reloading ammunition.
What follows is a pictorial summary of the handloading process. Bear in mind this is the process I use for handloading pistol ammunition; other handloaders might have different methods, techniques and/or equipment. Note also that the process for handloading rifle ammunition involves a few additional steps.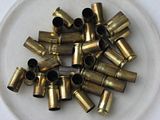
This is generally what fired brass looks like: dirty and grungy, with carbon build-up around the case mouth. If you look carefully, you will notice there are some 9mm and 380ACP brass mixed in with the majority of the 40S&W cases.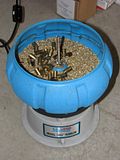
The dirty brass is thrown into a tumbler to be cleaned. The bowl of the tumbler contains cleaning media (in this case, crushed corn cob impregnated with kerosene). When the tumbler is switched on, a motor vigorously vibrates the bowl and its contents, causing the corn cob to rub against the brass and "scrub" it clean.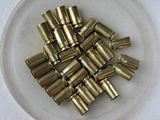
This is what the brass looks like after a couple of hours in the tumbler. I've removed the non-40S&W brass.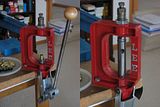
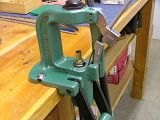
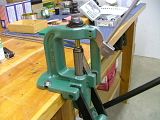
The case is placed on the shellholder atop the ram of the reloading press and pushed into the bottom of the resizing die screwed into the top of the press. This resizes the case; at the same time, a pin inside the die punches out ('decaps') the spent primer at the bottom of the case.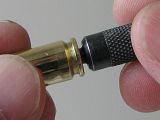
The decapping process removes the old primer, but doesn't clean out the primer residue from the primer pocket of the case. Though not really necessary, I like to clean out the primer pocket to prevent the residue from possibly contaminating the powder. It's an extra step that doesn't take up too much extra time.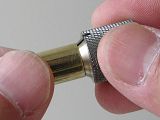
The inside neck of each case is then deburred with a chamfer tool pressed against the case mouth and twisted a few times. This allows the projectile to seat more easily.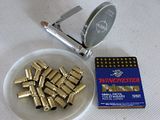
The empty cases are them primed. I prefer to use a handheld priming tool for this step.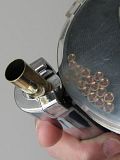
The handheld priming tool in action. An unprimed case is placed on the shellholder and a single primer from the tray is pushed into the primer pocket when the lever is pressed.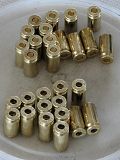
The cases at the top are all primed and ready to be charged with powder. The ones at the bottom have yet to be primed.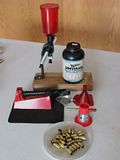
This is the equipment I use to charge the cases with powder.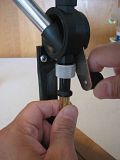
The powder dispenser is loaded with powder and adjusted to drop the desired amount of powder into the case with each crank of the handle.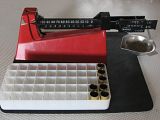
Gunpowder is not always of a uniform density, and the slight variations thereof can cause the charge weight to drift gradually during a single charging session. A weighing scale, like the one pictured here, is used to confirm that the powder dispenser is throwing the correct charge with each crank. I typically check-weigh every tenth charge dropped by the powder dispenser; in the image, the scale shows a charge weight of 5.4 grains, which is exactly what I want from the powder dispenser.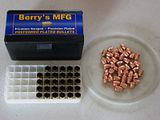
The cases have been charged and are now ready to have the projectiles seated into them.
With a bullet seating/crimping die screwed into the press, a charged case with a projectile placed loosely atop it is placed on the shellholder and then carefully pushed into the bottom of the die. The projectile is pressed into the case to a preset depth. In addition, at the top of the stroke, after the projectile is fully seated, the case mouth is pressed lightly into the jacket of the projectile to help retain the projectile and prevent it from sliding farther into the case when the cartridge is forcibly fed from the magazine into the chamber of the pistol.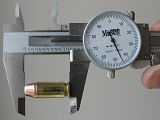
The length of each completed cartidge is measured to ensure that it is within specs. If a projectile is accidentally or otherwise seated too deep, it reduces the amount of volume in the case for the powder, and when the powder ignites, it will have less room to combust, driving pressures beyond safe levels and possibly causing the cartridge to rupture in the barrel chamber. When this happens, the pistol is almost always damaged or destroyed, with the possibility of serious injury to the shooter.
In this image, the overall length of the cartridge measures exactly 1.145", which is what my recipe calls for.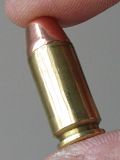
Voilà ! A precision handloaded and customized 40S&W cartridge which costs less than and will handily outperform even the most expensive commercially loaded 40S&W ammo!
-
Nice stuff!!!

-
Awesome!! HA! It sure is fun to live in the US!
-
Whoa, you could make money doing this for people....

-
good job in the explaination MG!
I do my .45 ACP on a Lee 1000 progressive ! done quite a desent job except for the priming part ! the Lee does a pretty lousy job on that.. it flips the primer sometime and sometime the seating you cannot feel it goes in.
DaveC! -
Hi there, thanks for a very informative text and photo post.
Excellent!!!
How many cartridges can you reload in an hour? Seems quite time consuming.
Is it easier to load pistols rounds than rifle rounds?
Do you need a different set of tools for different calibers or different types of catridges, e.g. bottle neck.. And are there any types of bullets e.g. soft point, hollow point that are difficult to hand load? -
How many times can you reload a cartridge?
What bullet do you prefer?
How do you buy these bullets?
How much is a round of mil grade 5.56mm cost?
Do you think SAF reloads its spent cartridges? -
On a single stage press like the one pictured, only one operation can be performed at a time with each pull of the lever. This simplifies things, but also slows down the reloading process when compared with a progressive press that performs several operations with each pull of the lever.Originally posted by moca:How many cartridges can you reload in an hour? Seems quite time consuming.
Is it easier to load pistols rounds than rifle rounds?
Do you need a different set of tools for different calibers or different types of catridges, e.g. bottle neck.. And are there any types of bullets e.g. soft point, hollow point that are difficult to hand load?
Assuming the brass is already tumbled and cleaned, I can typically churn out between 125 and 150 pistol cartridges per hour on that single stage press. Rifle rounds take a bit more time due to some additional steps like having to lubricate the cases before they are resized, and trimming the cases to the correct length if they've been stretched from previous firings.
Yes, each set of reloading dies is usually specific to a particular caliber, though there are a few exceptions. For example, 40S&W dies can also be used to reload 10mm, and 357 Magnum dies can also reload 38 Special.
Soft point and hollowpoint projectiles are loaded pretty much the same way as FMJ projectiles. You just have to make sure the seating die is adjusted to yield the correct cartridge overall length.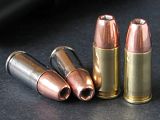
(Edited to add image of 9mm hollowpoint reloads.) -
great stuff


-
A number of factors determine how many times a case can be reloaded.Originally posted by moca:How many times can you reload a cartridge?
What bullet do you prefer?
How do you buy these bullets?
How much is a round of mil grade 5.56mm cost?
Do you think SAF reloads its spent cartridges?
Everytime a cartridge is discharged, the case expands to fill the chamber. When it is resized during the reloading process, it is forced back into its original dimensions. The flexing of the brass through repeated firing and reloading cycles will eventually weaken it to the point where the case mouth will no longer have enough strength to securely retain a projectile, or worse, the case itself becomes too weak to contain the pressures of the ignition and ruptures.
The normal operating pressures of a particular caliber also come into play. Low pressure pistol cartridges like the 45 ACP and 38 Special can usually be reloaded many times because the brass isn't stressed as severely as an inherently high-pressure cartridge like the 40 S&W or 9 mm.
Depending on its intended application, rifle brass can either be full-length-resized or neck-resized. The former resizes the the entire length of the case and puts more stress on the brass, while the latter resizes just the neck and mouth and doesn't work the brass as much. Consequently, neck-resized cases can be reloaded many more times than full-length-resized cases.
In any event, one can usually find copious quantities of commercial once-fired brass in the more popular calibers on the ground at a typical range, so the constant supply of 'fresh' brass means it's not necessary to reuse the brass you reloaded. However, less common calibers like the 357 Sig will usually require you to retrieve and reload the brass more than once.
As for my projectile preferences, I am partial to the copper-jacketed offerings from Berry's and Rainier in the more popular calibers as they are more cost-effective given the amount of shooting that I do. They've also proven to be every bit as consistent and accurate as the more expensive copper-plated projectiles from the likes of Winchester, Remington, Hornady, Sierra, etc.
I usually order most of my projectiles through the internet.
Not sure about whether or not the SAF reloads its cartridges; perhaps a currently serving SAF person can answer that question.
-
I doubt the SAF reloads their ammo...because of the vast amounts fired yearly. The costs of reloading I suppose would supersede the costs of buying brand new off the shelf. But then again I could be wrong...if not why do we bother to go pick up the ejected cartridges after range?
Btw Meia...I've got a question, after priming the cartridge, if you do not feed it with powder but proceed to cap it with a projectile, will the round still be able to be fired?
Thanks! -
Nice explanation and photos, MG. Other than the hand held priming tool, I'm using the same technique.
-
Thanks for the clarification.Originally posted by SpecOps87:I doubt the SAF reloads their ammo...because of the vast amounts fired yearly. The costs of reloading I suppose would supersede the costs of buying brand new off the shelf. But then again I could be wrong...if not why do we bother to go pick up the ejected cartridges after range?
Btw Meia...I've got a question, after priming the cartridge, if you do not feed it with powder but proceed to cap it with a projectile, will the round still be able to be fired?
Thanks!
Regarding the scenario you just described, the primer will still ignite, but would only have enough energy to propel the projectile a short distance into the bore, where it would remain firmly stuck.
A completed cartridge absent the powder is generally referred to as a squib, and is almost always the result of some distraction encountered during the reloading process.
If the shooter does not realize what has happened and proceeds to eject the case, chamber a fresh round and fire it, there is a fair chance that the barrel will bulge and/or rupture behind the obstructing projectile. This is generally regarded as a Bad Thing, and can result in acute embarrassment if not outright injury at the shooting range.
(Fortunately for yours truly, in the tens of thousands of cartridges I've handloaded and shot to date, I've yet to accidentally make a squib.) -
Thanks, skid.Originally posted by skid:Nice explanation and photos, MG. Other than the hand held priming tool, I'm using the same technique.
So how do you prime your cases? -
Years ago or maybe last year the SAF had this bullet case cleaning machine that reduces the time and makes it safer? From this i presume that they do reload their ammo or maybe they just melt them down and cast them again... They come in those green boxes...Originally posted by SpecOps87:I doubt the SAF reloads their ammo...because of the vast amounts fired yearly. The costs of reloading I suppose would supersede the costs of buying brand new off the shelf. But then again I could be wrong...if not why do we bother to go pick up the ejected cartridges after range?
Btw Meia...I've got a question, after priming the cartridge, if you do not feed it with powder but proceed to cap it with a projectile, will the round still be able to be fired?
Thanks! -
Ah...i see...i recall those green labels on the cardboard 50round ammo boxes. And my bad..Meia, I would wish to give a 70% confirmation that the cartridges used are actually reloaded. Why? Because I noticed that the cartridges at the point where it tapers down to the projectile area, is pretty tarnished mostly. As such...I believe they are reloads. Once again...sincere apologies.Originally posted by wonderamazement:Years ago or maybe last year the SAF had this bullet case cleaning machine that reduces the time and makes it safer? From this i presume that they do reload their ammo or maybe they just melt them down and cast them again... They come in those green boxes... -
No apologies required, sir.Originally posted by SpecOps87:Ah...i see...i recall those green labels on the cardboard 50round ammo boxes. And my bad..Meia, I would wish to give a 70% confirmation that the cartridges used are actually reloaded. Why? Because I noticed that the cartridges at the point where it tapers down to the projectile area, is pretty tarnished mostly. As such...I believe they are reloads. Once again...sincere apologies. It's difficult if not impossible to tell if a cartridge is new production or reloaded just by looking at it.
The 'tarnishing' you see in the neck area of the cartridges is a result of the annealing process the cases are subjected to during the manufacturing process. Before the cases are charged with powder, they roll through a machine that momentarily blasts a white-hot flame at the necks of the cases. This tempers the brass in the neck to allow a firmer grip on the projectile; it also causes the discoloration around the neck of the case. -
Hmm...any obvious telltale signs then? As I noticed that for certain batches...the projectiles don't sit properly in the cartridge, is that a sign?Or is it possible that its due to the round being improperly charged into the chamber?Originally posted by Meia Gisborn:No apologies required, sir. It's difficult if not impossible to tell if a cartridge is new production or reloaded just by looking at it.
The 'tarnishing' you see in the neck area of the cartridges is a result of the annealing process the cases are subjected to during the manufacturing process. Before the cases are charged with powder, they roll through a machine that momentarily blasts a white-hot flame at the necks of the cases. This tempers the brass in the neck to allow a firmer grip on the projectile; it also causes the discoloration around the neck of the case. -
Actually, the SAF ammo don't look re-loaded to me.
I noticed the flame marks around the neck , too/ But then, the cartridge case is usually without any scratches. Unless it is possible to remove all scratches from the case, otherwise I think the ammo we fire are new.
Just a guess... -
Telltale signs of reloading? Off the top of my head, I can think of a few.Originally posted by SpecOps87:Hmm...any obvious telltale signs then? As I noticed that for certain batches...the projectiles don't sit properly in the cartridge, is that a sign?Or is it possible that its due to the round being improperly charged into the chamber?
When a case is extracted and ejected right after firing, the claw of the extractor that pulls the case out of the chamber will usually leave a tiny indentation on the rim of the extractor groove around the base of the case. The number of indentations on the rim is a pretty reliable indicator of the number of times that particular case has been reloaded and fired.
When a cartridge is discharged, the base of the case is forced violently against the breechface. Any tooling marks and/or surface imperfections on the breechface will leave an impression on the base of the case. The headstamp showing the caliber and manufacturer of the case will also gradually lose its definition through repeated firings.
During the reloading process, it's quite easy to tell if a case has been reloaded too many times previously. The brass will resize too easily or crack around the case mouth, and the primer pocket would have exapanded to the point where it not longer securely retains a primer.
As for the inconsistent projectile seating depths you noticed, I'd attribute it to poor quality control at the manufacturing facility. I've noticed that same problem with commercial ammo in this country too.
That's another reason we handload: to have better control over the quality of the finished product.
-
What MG just said further convinces me that our SAF ammo are not re-loads. No scratch marks any where that I can remember seeing.
-
yes that should be true. from all the many rounds that i've fired, loaded into magazines, i've not seen one with scrathes.Originally posted by moca:What MG just said further convinces me that our SAF ammo are not re-loads. No scratch marks any where that I can remember seeing.
so what do they do with all the empty cartridage that we pick up after ranges? -
YOu cannot see the scratches after you clean your brass in the thumbler as shown in the pic by MG! I picked up some pretty badly tarnish and scratch up brass! but after the thumbler and polishing compound! it comes out like new and smooth
just to bring out the point!
DaveC! -
I don't know if this should be revealed..but take note of the ammo box which shows the manufacturer of our ammo. The country of origin is S.Africa...so mebbe they do the handloading there? But frankly...how much more does a person save with handloading? And does it make more $$ and Sense to buy off the shelf for an army or to do reloading?
Btw Meia...don't mind me asking...you mentioned that the rifle cartridges go through a white-hot flame for annealing, but what about pistol cartridges? -
The RCBS press I use has a hinged mechanism that moves back(away from the shell) to accept a primer from a tube that I fill up, and then hinges forward into a slot machined into the ram and inserts the primer on the down-stroke of flaring the shell to accept the projectile. After seating the primer you need to raise the ram and shell up a little to allow the mechanism to hinge back to the starting position.Originally posted by Meia Gisborn:Thanks, skid.
So how do you prime your cases?